This is just a place for us to record all our renovations/D.I.Y projects
as we attempt to make our new house a home.
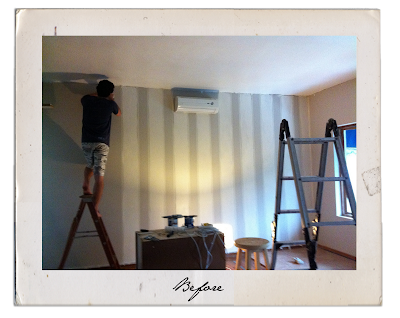
It all started in August 2011, we began the hunt to find our first house. After only a few weeks of looking around we decided on a 3 bedroom duplex/freestanding house with a pool. We put in an offer and signed the sale agreement on the 19th September 2011. Our house was finally registered in the deeds office on Monday the 7th November 2011. We got the keys on the Thursday and started moving in our furniture that weekend. The place was very dirty and hadn't been looked after very well so there was A LOT of cleaning to do. The first place we started was in our bedroom. Here are a couple of pics with some before, during and after shots of our bedroom.
THE PAINTING
THE PAINTING
Panorama of our room with everything stripped out ready to be cleaned and painted.
The walls and cupboards were a 'not so lovely yellow/tobacco stained' colour.
Panorama of the room with all the walls painted with two coats of Dulux Luxurious Silk, Chalky Downs 3. Even the insides of the cupboards had to be thoroughly cleaned, vacuumed and repainted to get rid of the smell of old cigarette smoke.
THE STRIPES

Panorama of the room with all the walls painted with two coats of Dulux Luxurious Silk, Chalky Downs 3. Even the insides of the cupboards had to be thoroughly cleaned, vacuumed and repainted to get rid of the smell of old cigarette smoke.
THE STRIPES
After all the walls had been painted we attempted to paint the wall that would be behind our bed, with stripes. We used Dulux Luxurious Silk, Chalky Downs 5. It took two whole days to measure mask and paint the stripes. We were told we should rather paint the stripes in a darker colour, but we painted them in a colour that was 2 shades lighter and surprisingly it covered very well.
THE CORNICING
We also added cornicing to the room as there originally was none. It just finished it off nicely and gave it that extra bit of style. The cornicing we used was from Builders Warehouse. The product is from Gyproc, and is called RhinoArt. It is made of a high density extruded polystyrene. Before installing it we gave it a coat of paint, even though it was already white, just to be sure that the white would be the same as that of the newly painted ceiling.
It was relatively easy to install but as always, these things take longer the you expect. It took about a day to put up. The style of cornicing we used was called Angelico. We used Rhino Art Decor adhesive to put it up.
Each box comes with 6 x 2m stripes of cornice, so we used just under two boxes for the bedroom, including a couple of dud pieces because cutting the angles on the mitre box didn't always work exactly, even though we measured them more than once to be sure.
*TIP:* When cutting the cornicing it has to be at 45 degrees
in the mitre box (as it would be on the wall), not flat.
in the mitre box (as it would be on the wall), not flat.
Some pics with the new light fitting and ceiling rose in, a few more 'finished' pics to be uploaded soon once the cupboards have all been painted and had their handles put on.


Nice, I like the light fitting!
ReplyDelete